
Access multi-presentations in a single form of Process Cloud.


Introduction

In this blog I will be explaining about accessing multi forms in a single form of PCS.

Main Article

Consider a scenario where there are multiple forms, and you want to access them or have them displayed in a step-by-step fashion.

To achieve this, you need to drop train component from the Basic palate to the form you have created.


Once you drop it follow the below steps:

1.       Fill the details as below


2.       Provide the form names in the option names and same in the values.


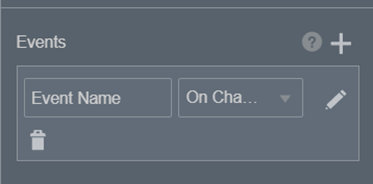
3.      Click on the events and choose On Change event.


4.       Design the condition as below, where a check would be performed on the flow.

  In this case we are checking if the name of the flow is approve or not.


 If the condition is met the page is going to get transferred to new form chosen.

Click on OK


Go to the preview section.

As you could see in below screen shot the default page is details page.


Once I click on the approve button, a new form will get loaded.


Hope you have liked my article.


Do let me know in the comments on the topics you want to explore in process cloud.


Make sure you drop a comment if you find the post useful.


- Preetham Konjeti

Comments

Popular posts from this blog

Convert App based Integration to Scheduled Integration without wrapper in OICS

we all know that converting a scheduler integration to REST is quite easy , where as the reverse is not possible and the only way to achieve it is through creating a wrapper scheduler integration and invoking the trigger one as child from there. But there is another way through which we can achieve the direct conversion. For that please refer to below example. Note : Every step mentioned has to be done very carefully Create Scheduler Integration. I’ve created a base one in which it invokes a SOAP service.  I’ve created a small trigger integration which I’m going to change to scheduler without any wrapper. Please follow the below steps to convert rest based to scheduler:     1)    Export the integration.     2) Rename the iar file to zip.     3) Now unzip the file.     4)    Compare the properties files of both scheduler and rest based integration and make the changes to rest based as per the scheduler integration After changes Now open the resources folder: Move the scheduler resour

ChatGpt X Oracle Digital Assistant Integration

  Introduction In this article I will be explaining about integrating the ChatGpt with Oracle Digital Assistant. NOTE : This is not a suggestion to have ChatGPT in your ODA, this article is just to showcase the flexibility of the ODA to easily integrate with anything. Main article ChatGPT ChatGPT is an AI language model developed by OpenAI, capable of processing natural language input from users and generating coherent and relevant responses. It has been trained on an enormous corpus of text data using unsupervised learning, allowing it to generate responses that are not just grammatically correct, but also contextually appropriate and engaging. ChatGPT is particularly useful in scenarios where there is a need for rapid and accurate responses to user queries, such as in customer service or personal assistants. However, it may struggle to generate appropriate responses in certain situations and may not be suitable for scenarios requiring a high degree of personalization or cus

Backup Integrations of an Instance with a single click using OIC

  Introduction One common mistake that most of OICS developers make is not taking the backup of their integrations religiously and if they want to take backups clicking on the export of the integrations individually could be quite tedious. Main Article In this blog I will be explaining about automating the backup process in OICS. Below is the order of the steps that are to be followed: STEP:1 1) Configure a Rest trigger connection as shown below. Provide the below payload in the request section:     {   "IntegrationName”: "" } STEP:2   Configure the new rest connection as mentioned below. (This basically list downs all the integration details as per the provided name).   Provide the Query parameters as below:   Provide the response payload as below: {   "hasMore" : "false",   "items" : [ {     "id" : "",     "name" : "",     "lockedFlag" : &quo